This documentation will guide you through setting up Tresorit SSO with Okta. You’ll have to create and configure a new application on the Okta Admin UI under Applications. During this configuration, you will acquire GUIDs that you’ll have to set in Tresorit’s Admin Center. Once you have the GUIDs, you can set up the policy groups and users and enable SSO policy for them, as a last step.
How to set up SSO in Tresorit
Configuring a new application in Okta
As a first step, ensure that OAuth 2.0 for Okta APIs is enabled on the organization.
Extending the user profile schema
Click on Directory and Profile Editor, then choose Okta from the filter list and select User (default). Click Add Attribute to add TresoritLoginKey to your user schema with Read-Write permission:
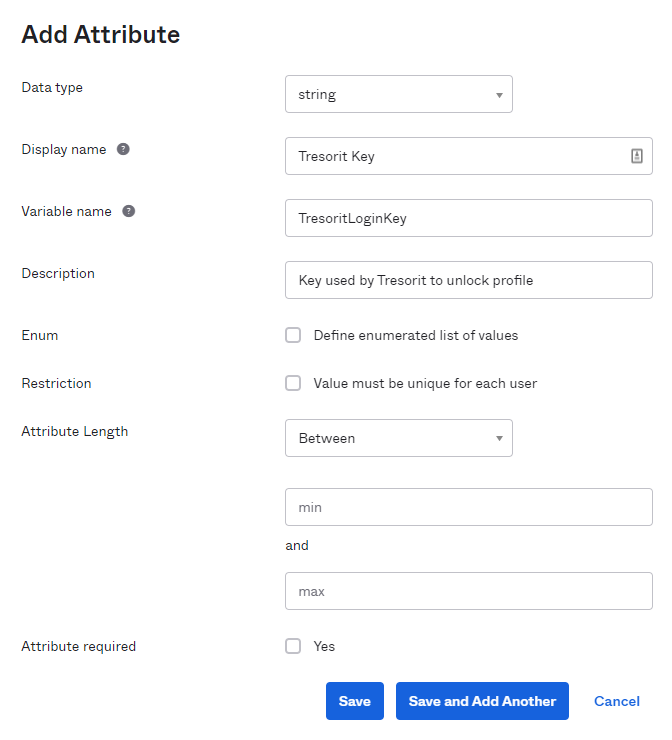
The Read-Write permission needs to be modified after saving the attribute on the editor screen:
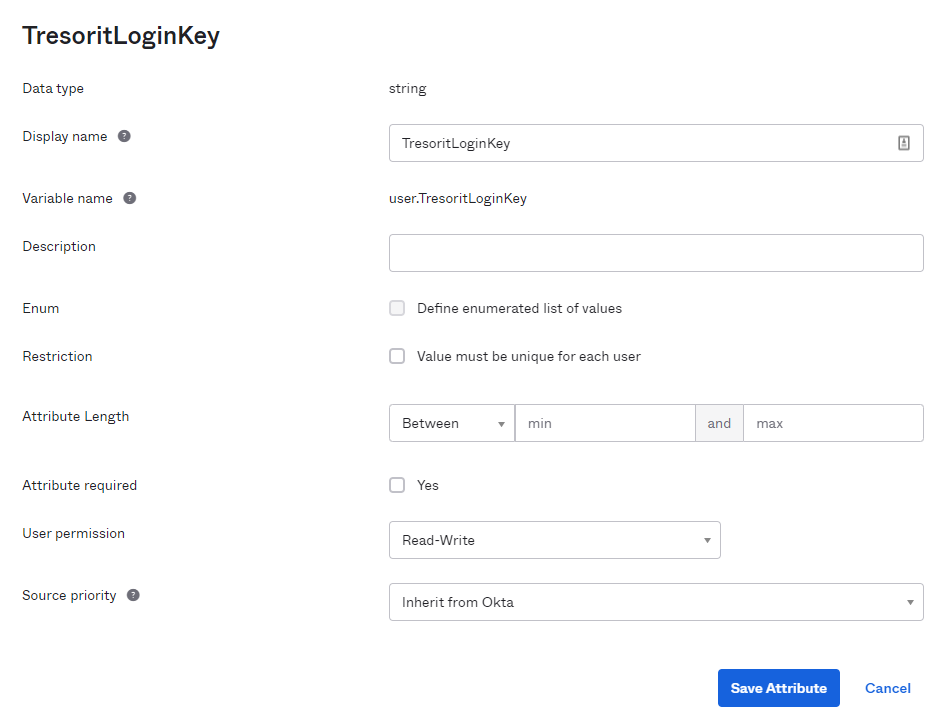
It is required for the TresoritLoginKey to be mastered by Okta or at least modifiable through Okta's API. This can be achieved by setting the attribute's Source priority to Inherit from Okta.
Registering an application
Click on Applications and Create App Integration, then select OIDC - OpenID Connect and select Native application, and click Next.
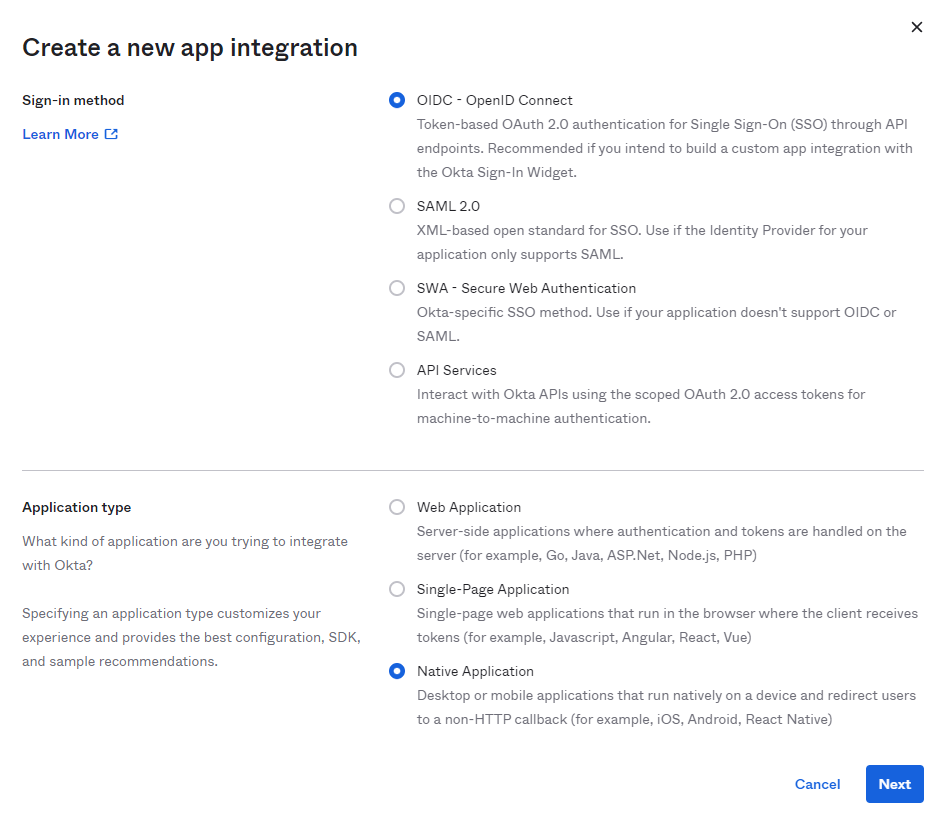
Enter a Name for your app (such as Tresorit).
Add the following Login redirect URIs:
Add the following Logout redirect URIs.
After you’ve successfully created an application in the Client Credentials section, you’ll see the Client ID of the newly created application. Make sure to remember the Client ID, since it will be required later.
Ensure that the following Grant types are checked:
- Authorization Code
- Implicit (Hybrid)
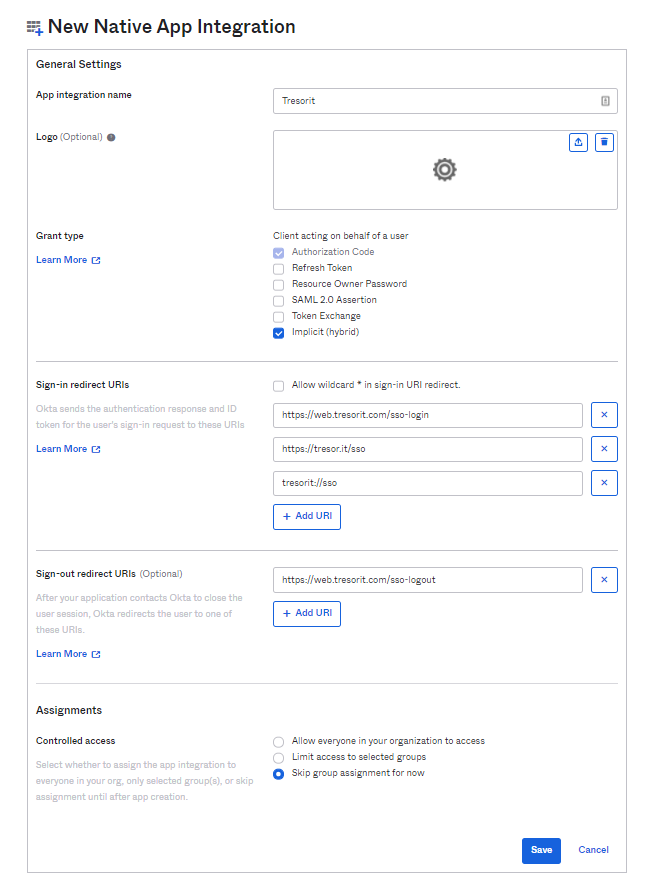
You can create your Group assignments here (this can be done later as well). This is required for your users to have access to this application.
Setting a custom issuer domain (Optional)
Setting a custom issuer domain allows you to have a custom login URL as a subdomain of your company domain, like okta.mycompany.com. This requires additional steps from your IT infrastructure. To set this URL up, please refer to Okta’s documentation about this feature. If you’d like to let Tresorit use this domain for redirections during login, please provide it when you enable SSO in the Admin Center.
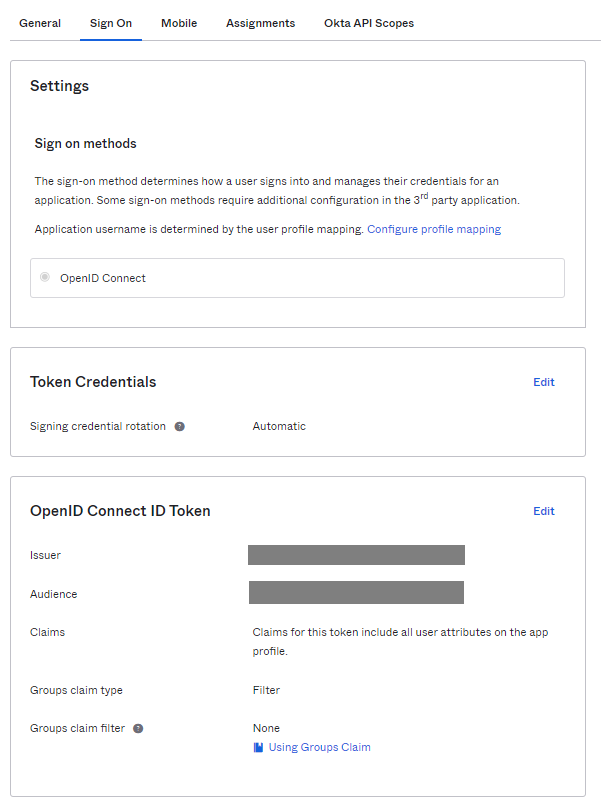
Navigate to your application. Under the Sign on tab, you’ll be able to view the custom issuer domain at OpenID Connect ID Token editor. Here you can select which issuer domain you wish to use. If you have only one that ends with .okta.com, then you do not have a custom issuer domain. If you have one that you’d like to use, please select it here, as you’ll have to set it up in Tresorit Admin Center as well a bit later.
Setting up Okta API Scopes
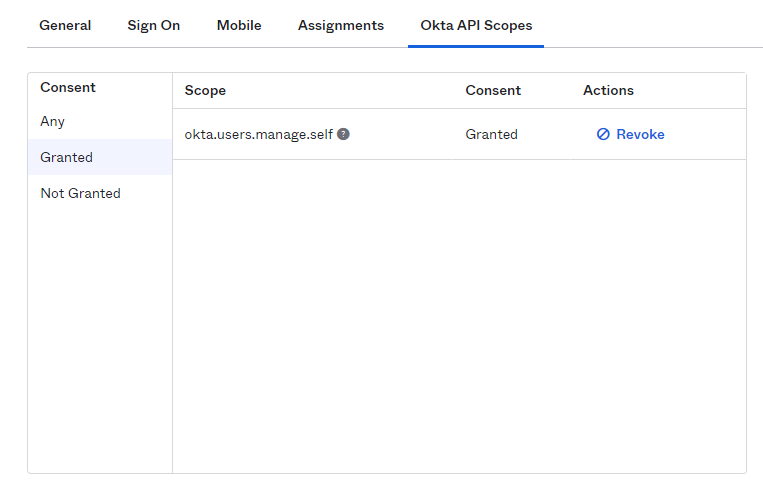
At the configuration panel of your Okta Application, go to Okta API Scopes.
Grant consent to okta.users.manage.self from the Any list. The Granted consent table should list it as seen below.
Enable Trusted Origins
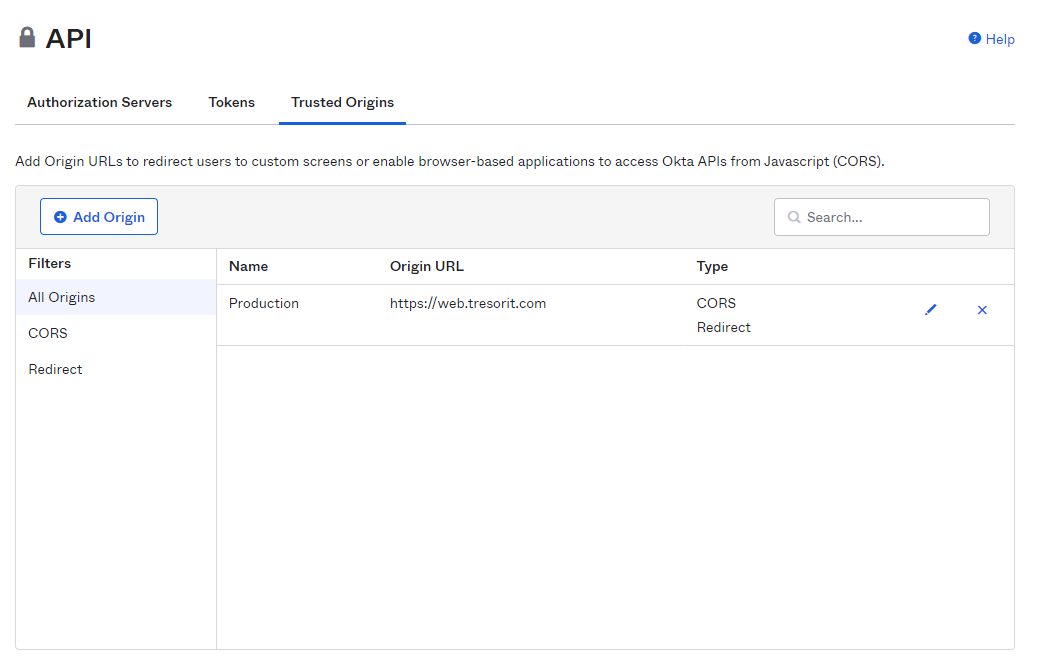
Navigate to the Security / API section, and select the Trusted Origins tab.
Add https://web.tresorit.com for CORS and Redirect:
Required Identifiers
Now that the configuration is done, you will need two (if you set a custom issuer URI earlier, three) Identifiers from the Okta Admin UI. These are the following:
- Organization ID
- Client ID
- and optionally the Custom issuer URL
The Organization ID is your Okta subdomain. You’ll only need to note the part between https:// and .okta.com. If it’s https://mycompany.okta.com, then your Organization ID is mycompany.
The Client ID can be found under the Applications tab of your Okta Admin UI. Navigate to your Application, and select the General tab. The Client ID can be seen under Client Credentials.

Setting up SSO in Tresorit’s Admin Center
Step 1. On the Settings tab
On the Settings tab, make sure that Advanced Control is enabled. Then click Enable SSO under the Single Sign-On section.
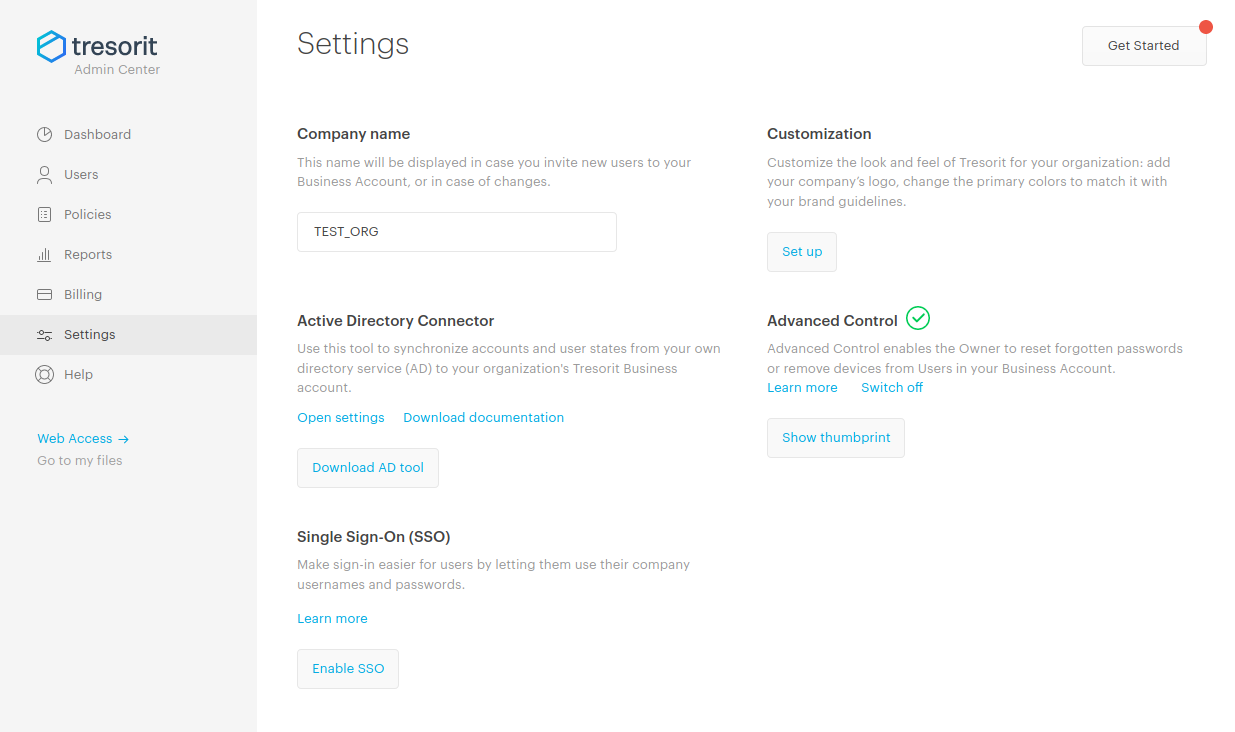
The following window will come up, prompting you to accept Tresorit's SSO specific Terms.
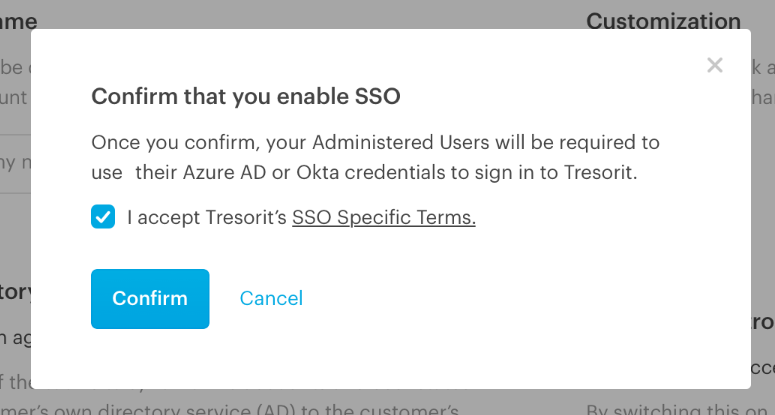
Once you accepted the Terms, select Okta and paste in the previously acquired IDs.
If you are using Okta EMEA as a Root domain, please select this option from the list. Companies based in the EMEA region does not automatically have this setup, please check this information in your Okta account.
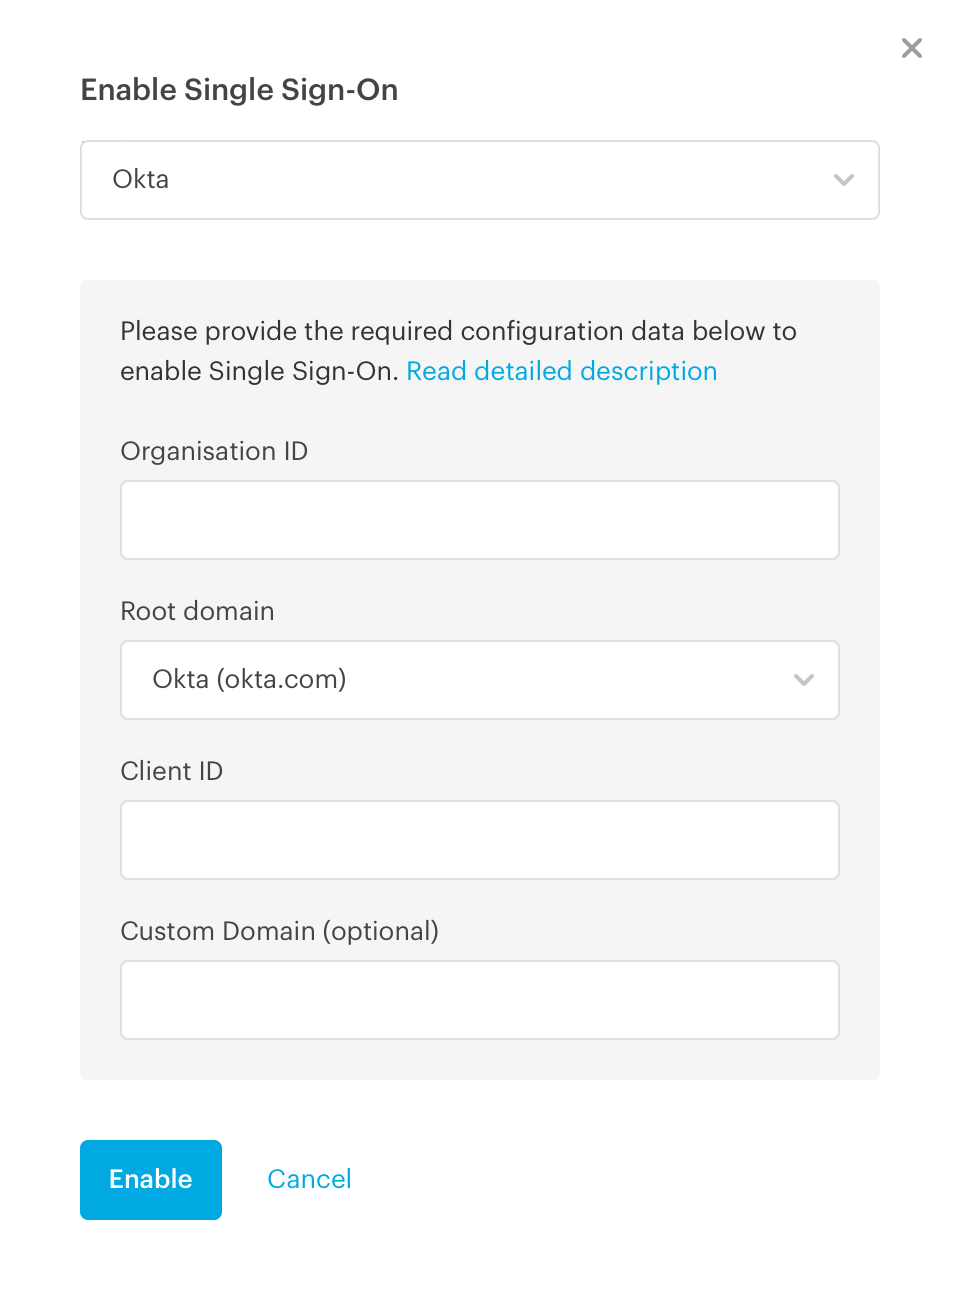
You might need to enter your password again if your session has expired. If you’re successful, a gentle notification should appear.
Step 2. On the Policies tab
Under the Policies tab, you can either create a new policy or edit an existing one. Set the Single Sign-On policy to Enabled, so the users with that policy will have to use the configured Okta server for signing in. Don’t forget to Save the changes to your policy.

The 2-Step Verification policy will be turned off for this group, as in case of SSO, this feature is handled by Okta. Your users will have to use 2-Step Verification via their configured method in their Okta profile.
Using SSO in Tresorit
Activation
For existing users in the policy group, a migration dialog will appear in the Tresorit applications. They will have to confirm their current password before being redirected to the company login page. After they log in there as well, their Tresorit password will no longer be valid, and they’ll only be able to sign in through the SSO option.
In case of the subscription owner, the Tresorit password remains, because it is still required for Advanced Control functionality.
Deactivation
When you disable the SSO policy for a user, they will be required to set a password again. In some cases, SSO authentication might not be available, so this process includes an email confirmation before letting them set their new password.
Sign up without an invitation
You can also verify that certain domains are in your control. In such cases, the new users in your company can perform their registration with SSO right away, and they won’t need to click on the invitation link. This provides a user friendly first sign-in experience. Learn how to verify your domain via this article.
Still have questions left? Drop us a line
