
This documentation will guide you through setting up provisioning in Tresorit with Azure AD. You’ll have to create and configure a new Enterprise application based on the SCIM protocol. To do so you’ll need to login to your Azure Portal and navigate to the Azure Active Directory configuration page. During this setup you also need to login to your company Tresorit subscription to execute certain actions in the Admin Center.
The feature is only available in the Enterprise plan.
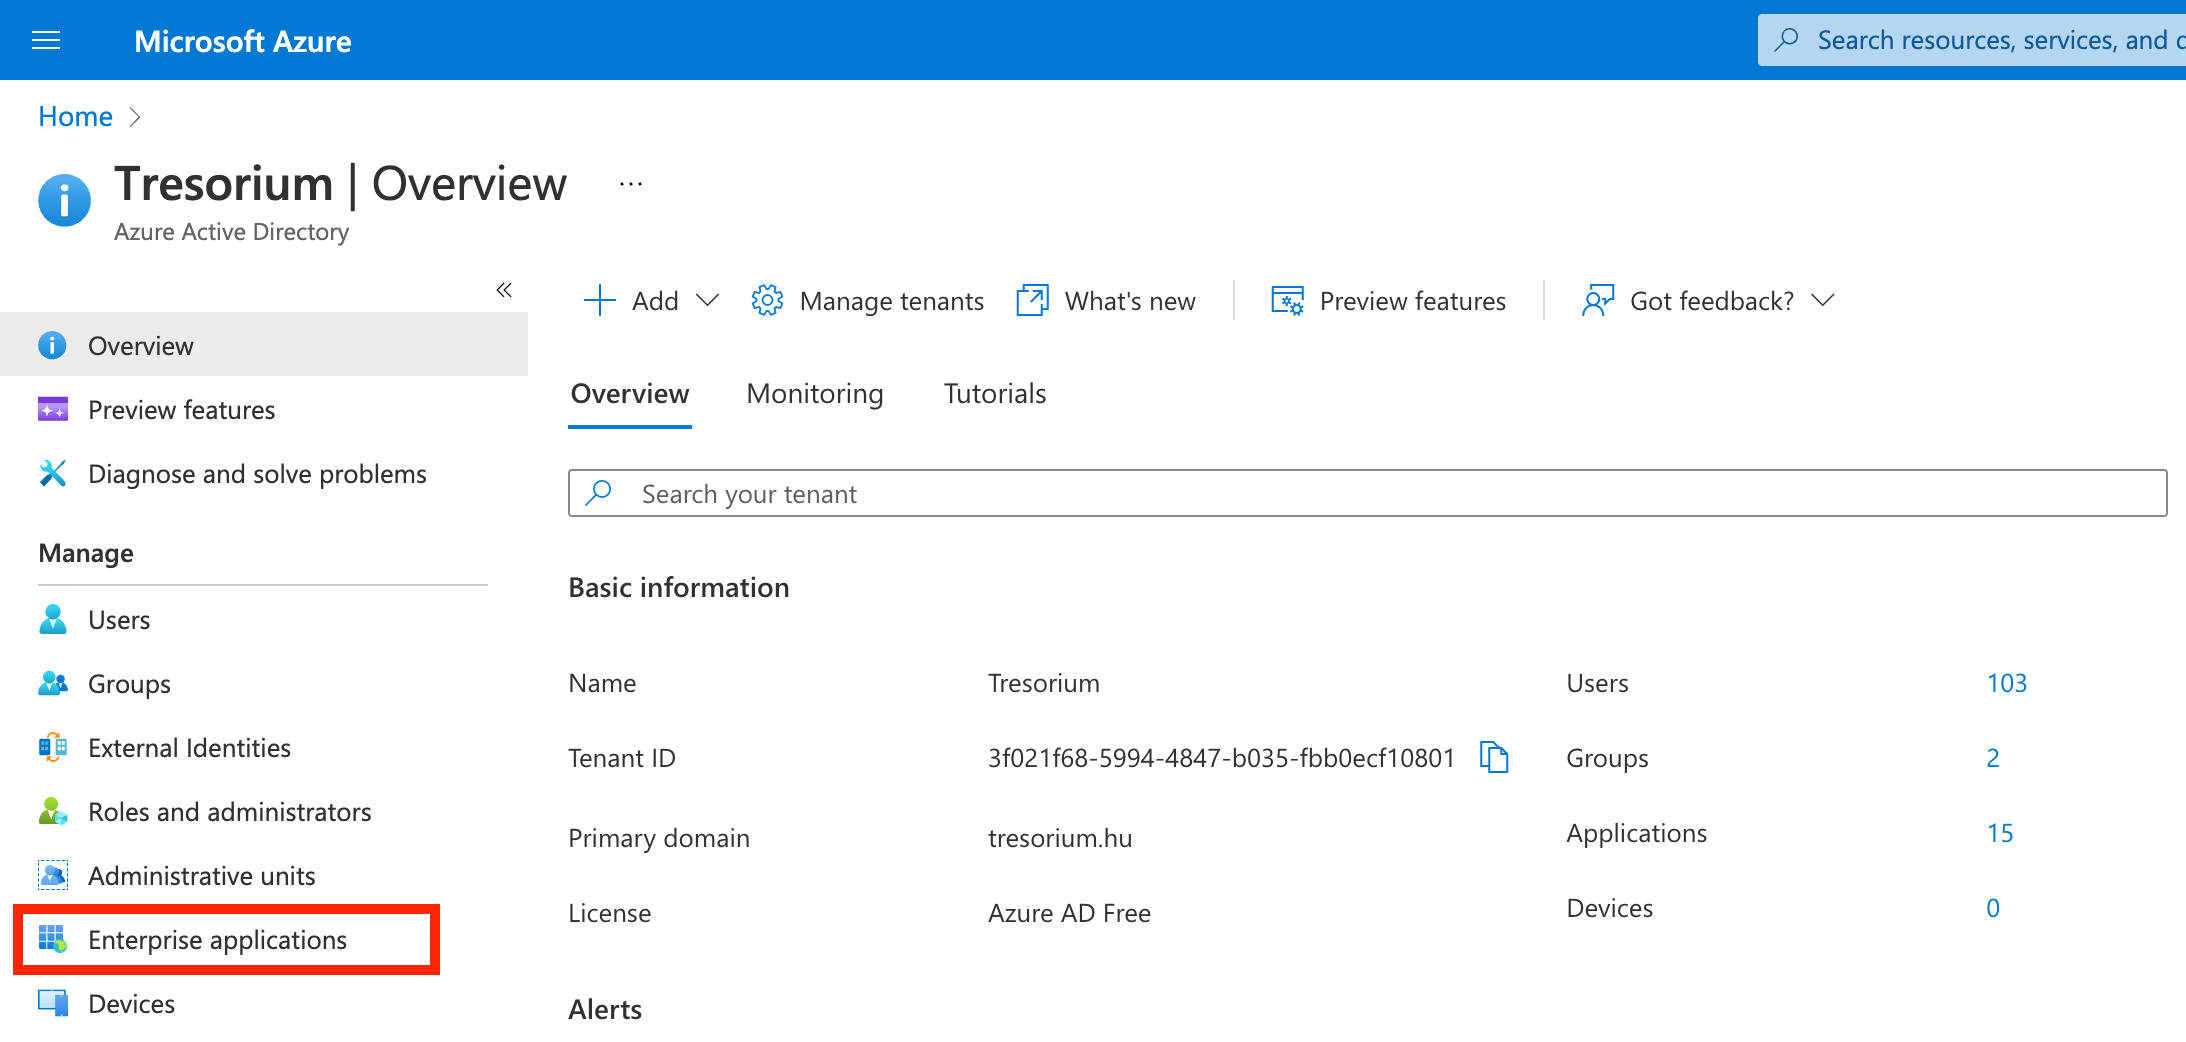
Configuring a new application in Azure Active Directory
Create a new Enterprise application
Click on Enterprise applications and create a New application.
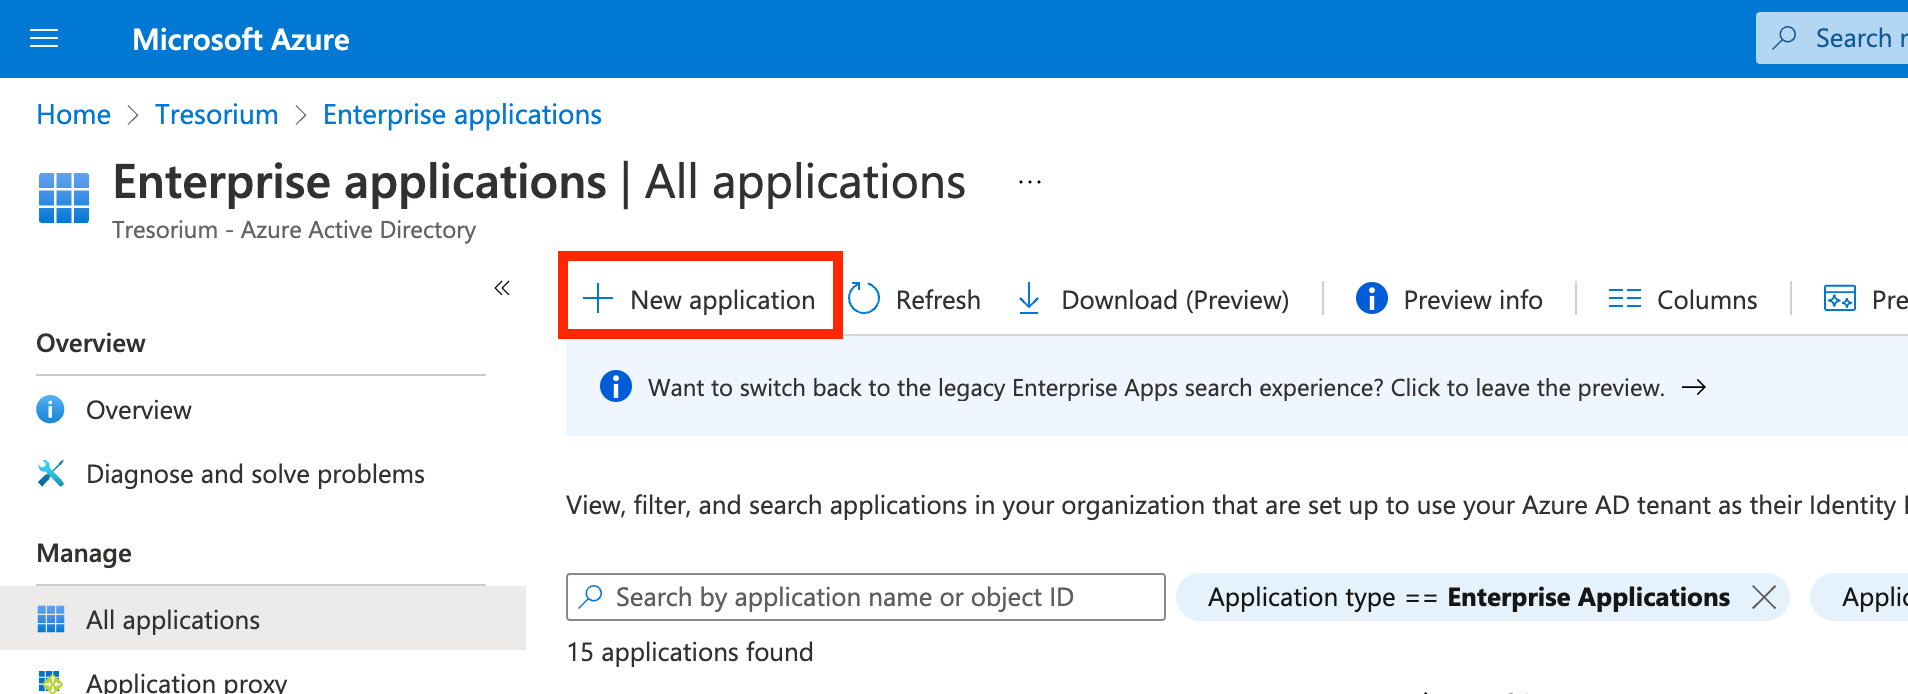
Click Create your own application
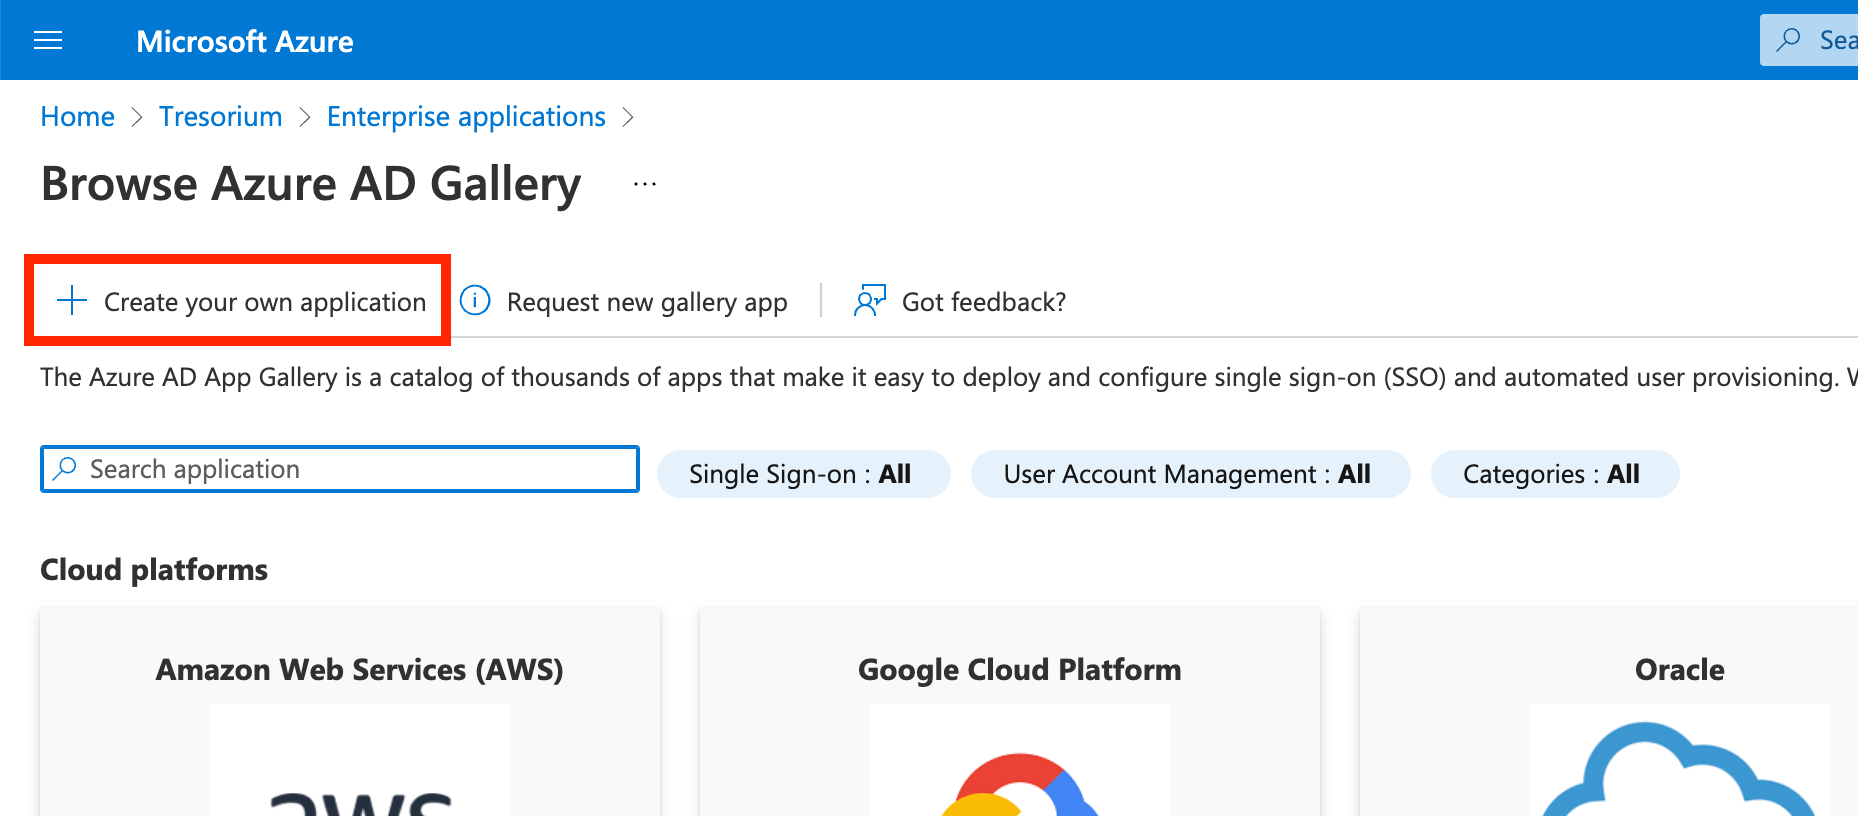
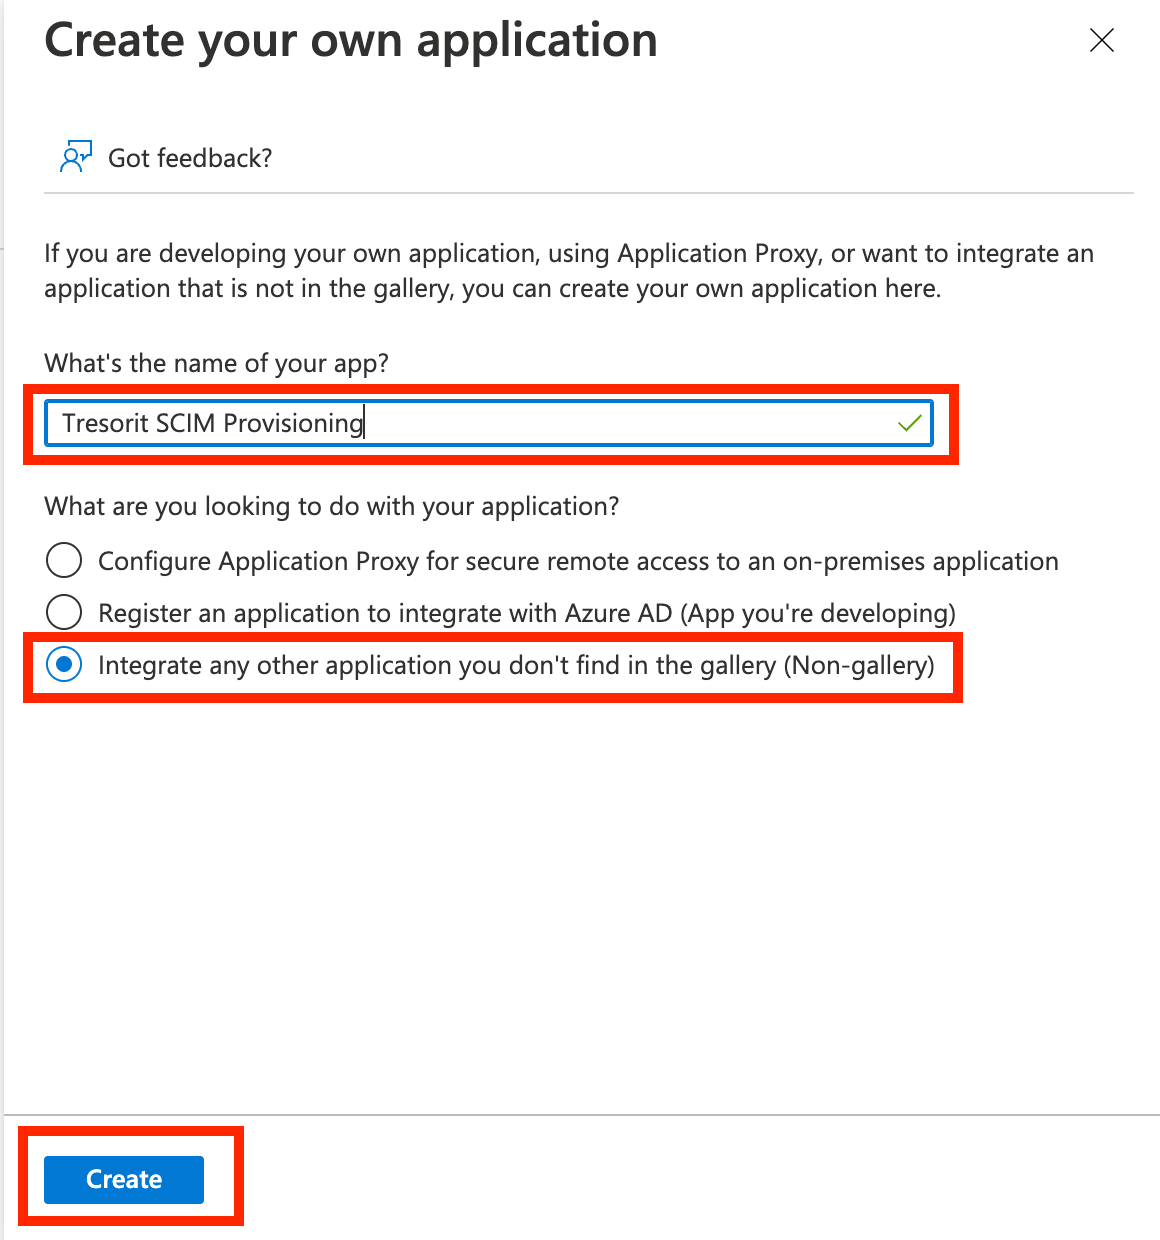
Enter a name for your application (e.g. Tresorit SCIM Provisioning) and select Integrate any other application you don’t find in the gallery (Non-gallery). Click Create.
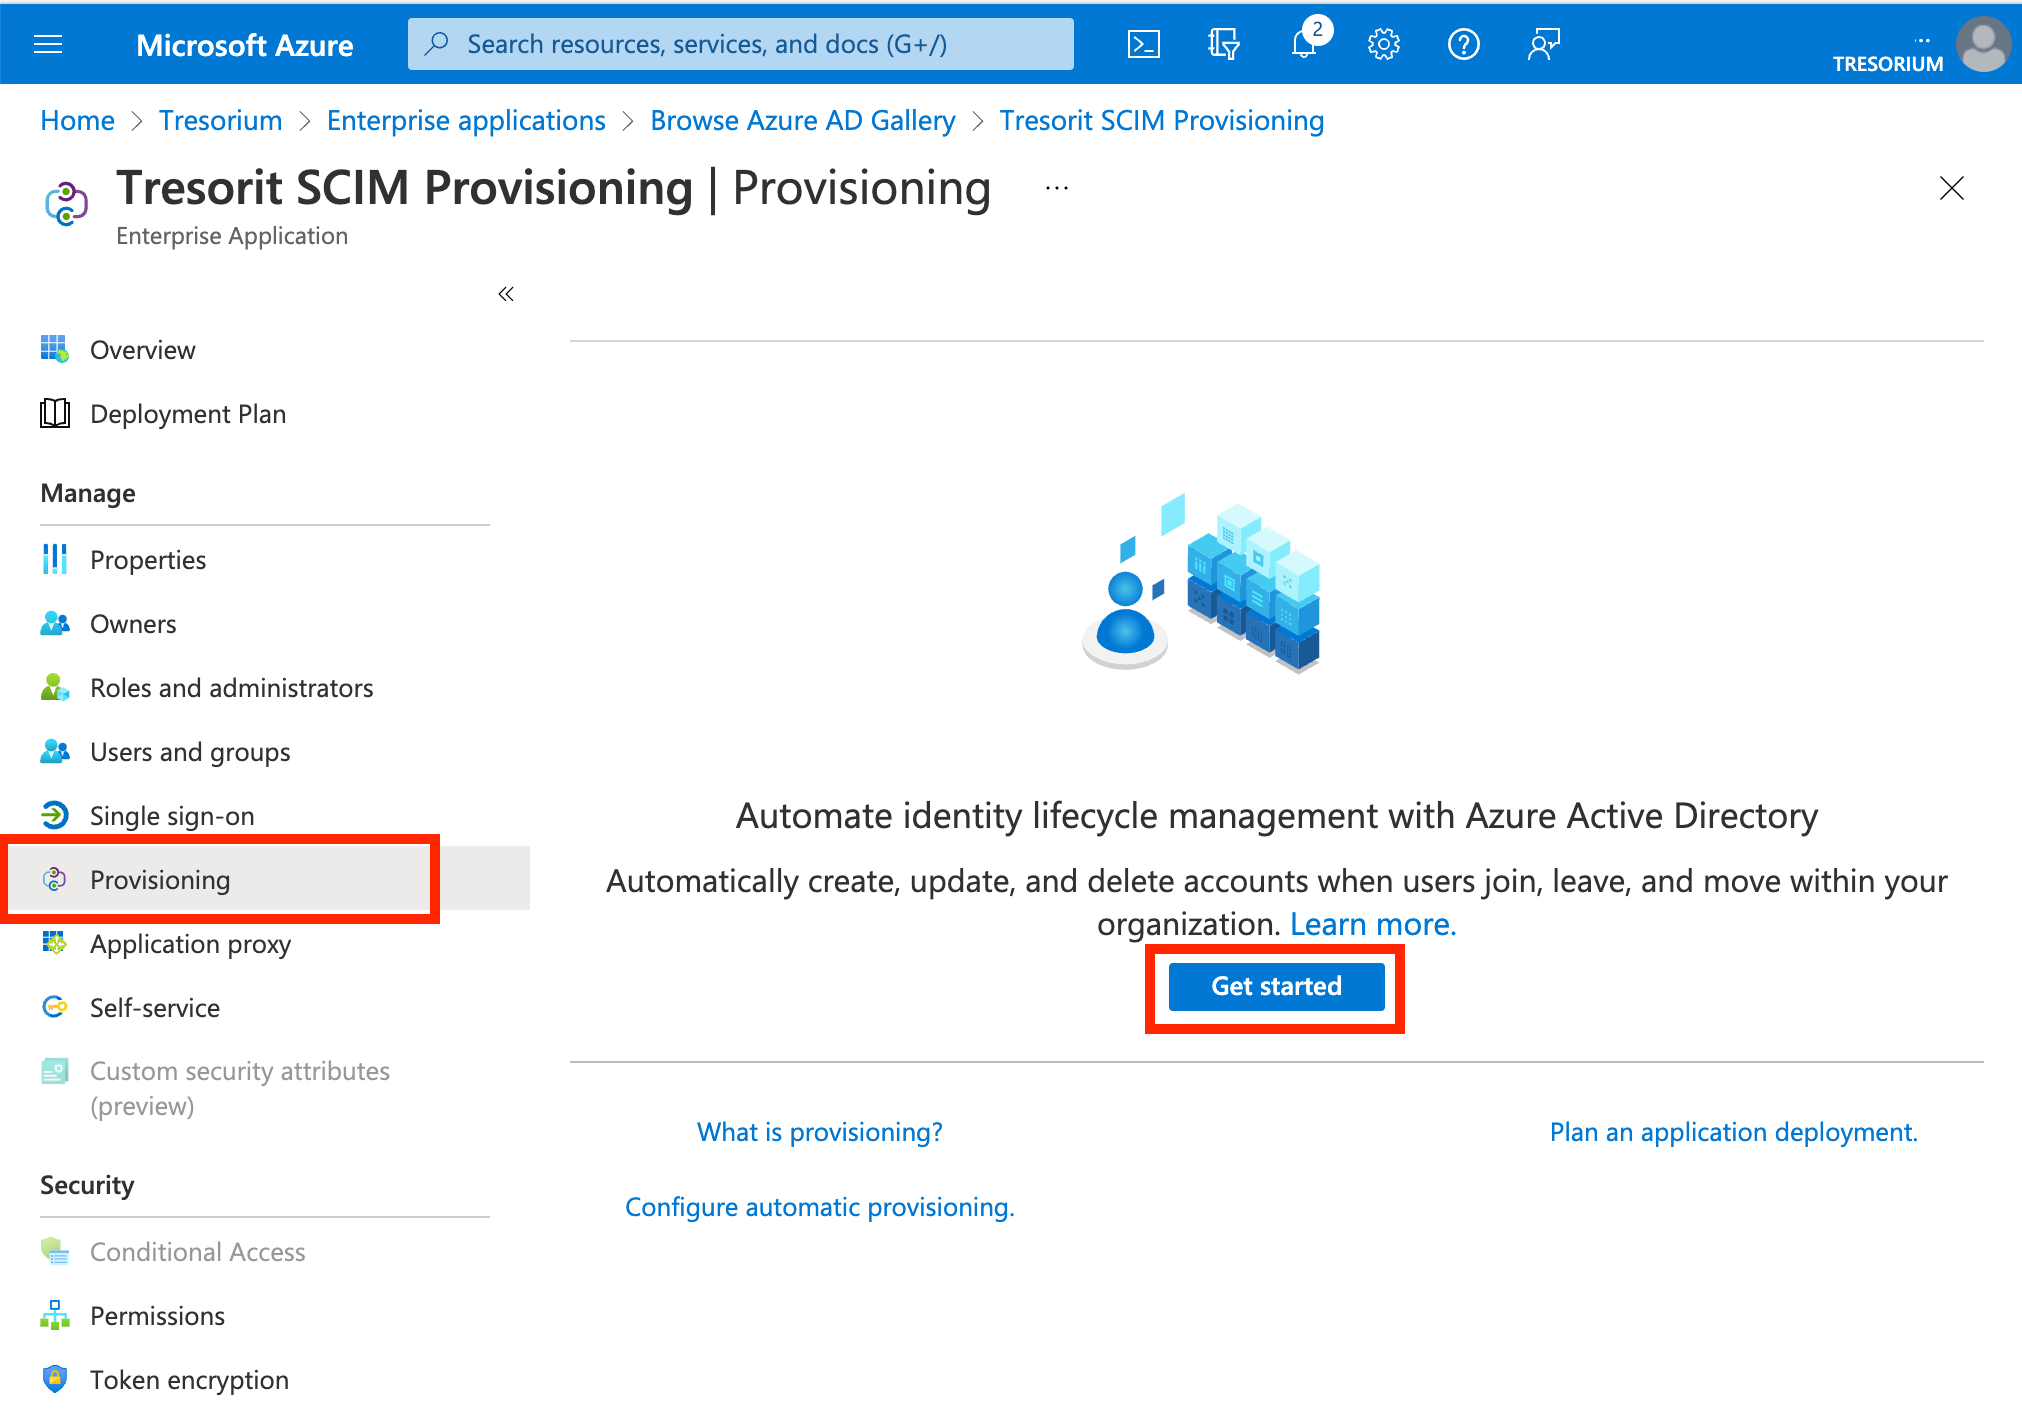
Select Provisioning in the created app, the click Get started.
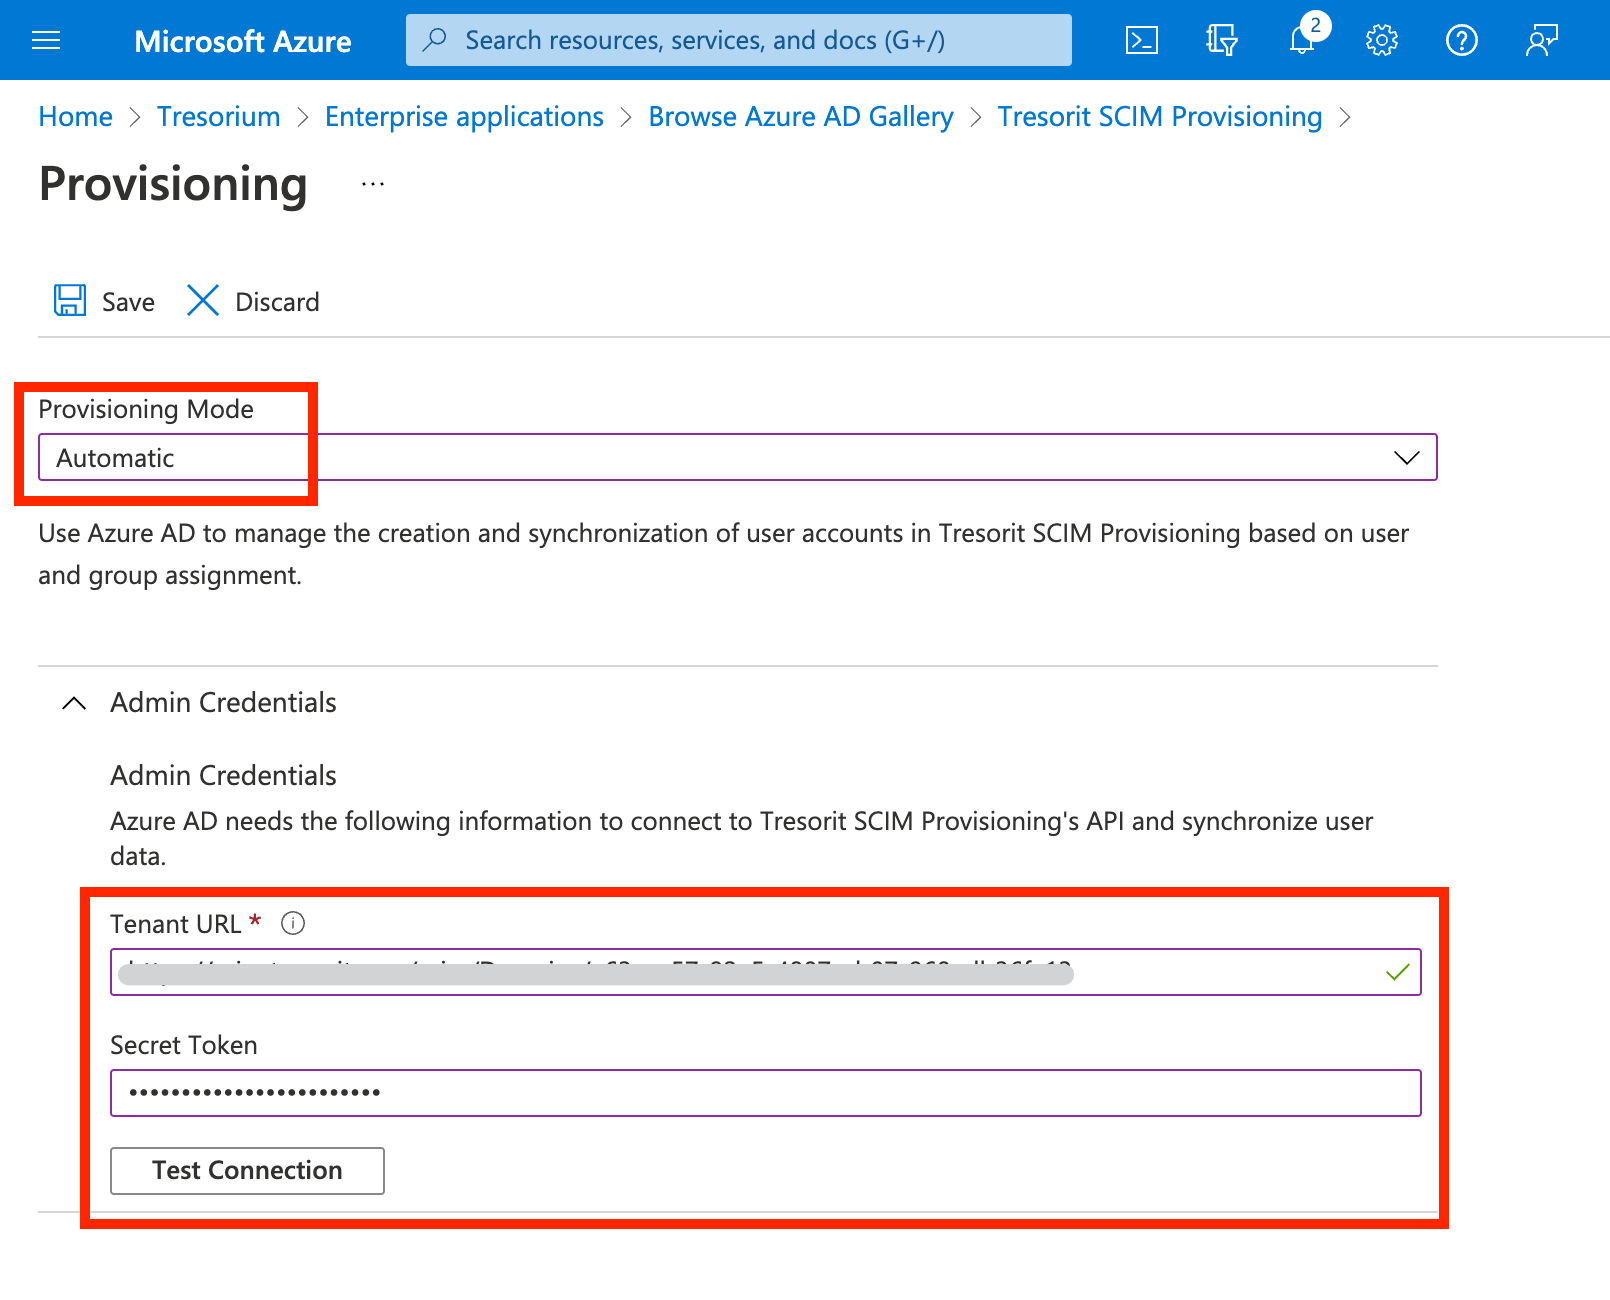
For the next step you have to provide the Tenant URL and Token provided by Tresorit.
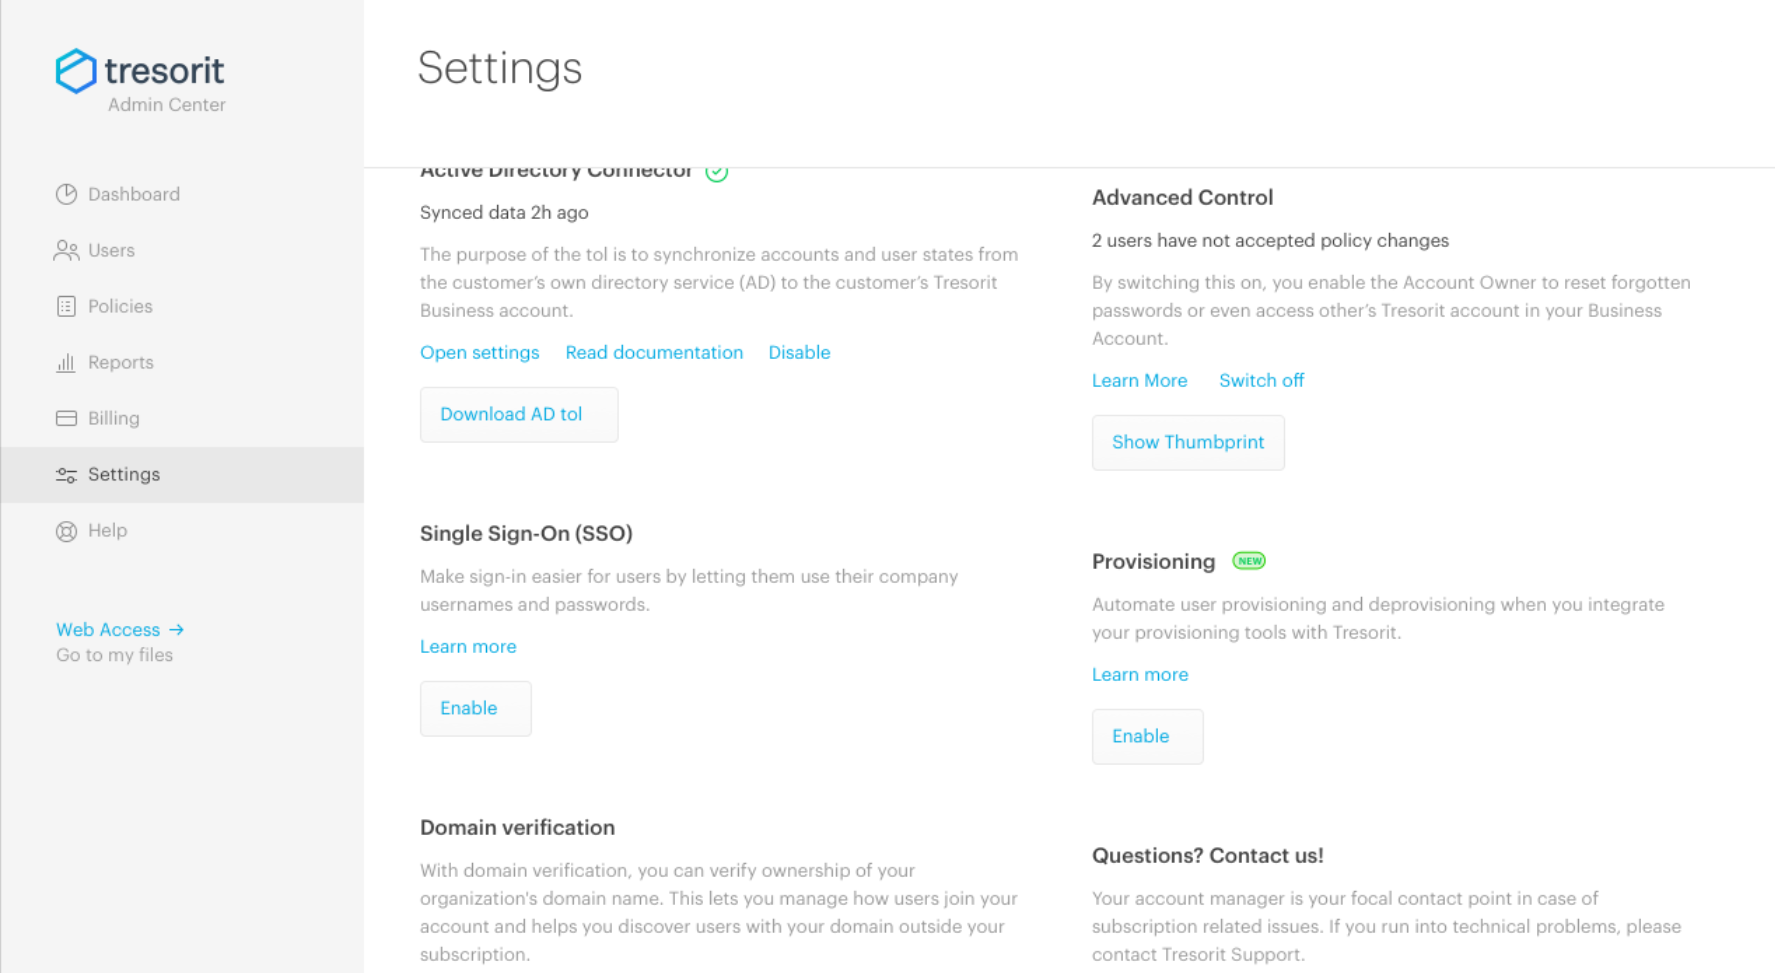
Go to the Tresorit Admin Center, open Settings and click Enable in the Provisioning section.
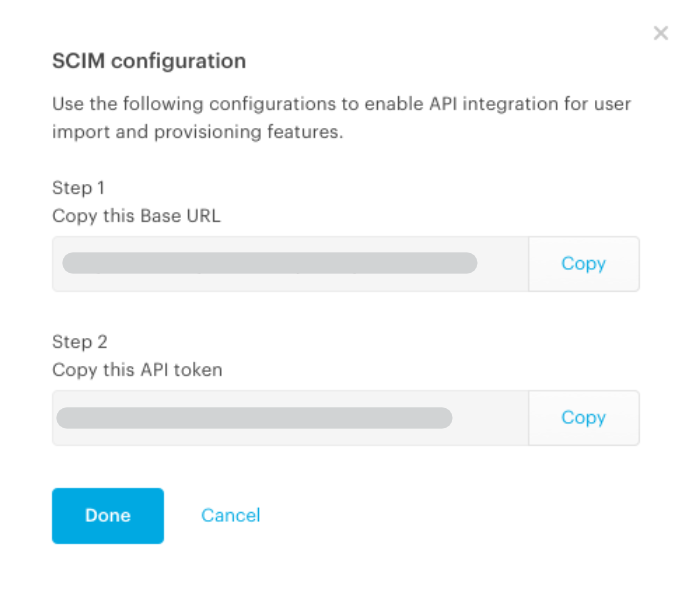
Copy the Base URL and API token from the Admin Center and paste them into the Azure AD provisioning credentials fields. Click Done in the Tresorit Admin Center. Then click Test Connection.
On success a notification will appear.

Click Save.
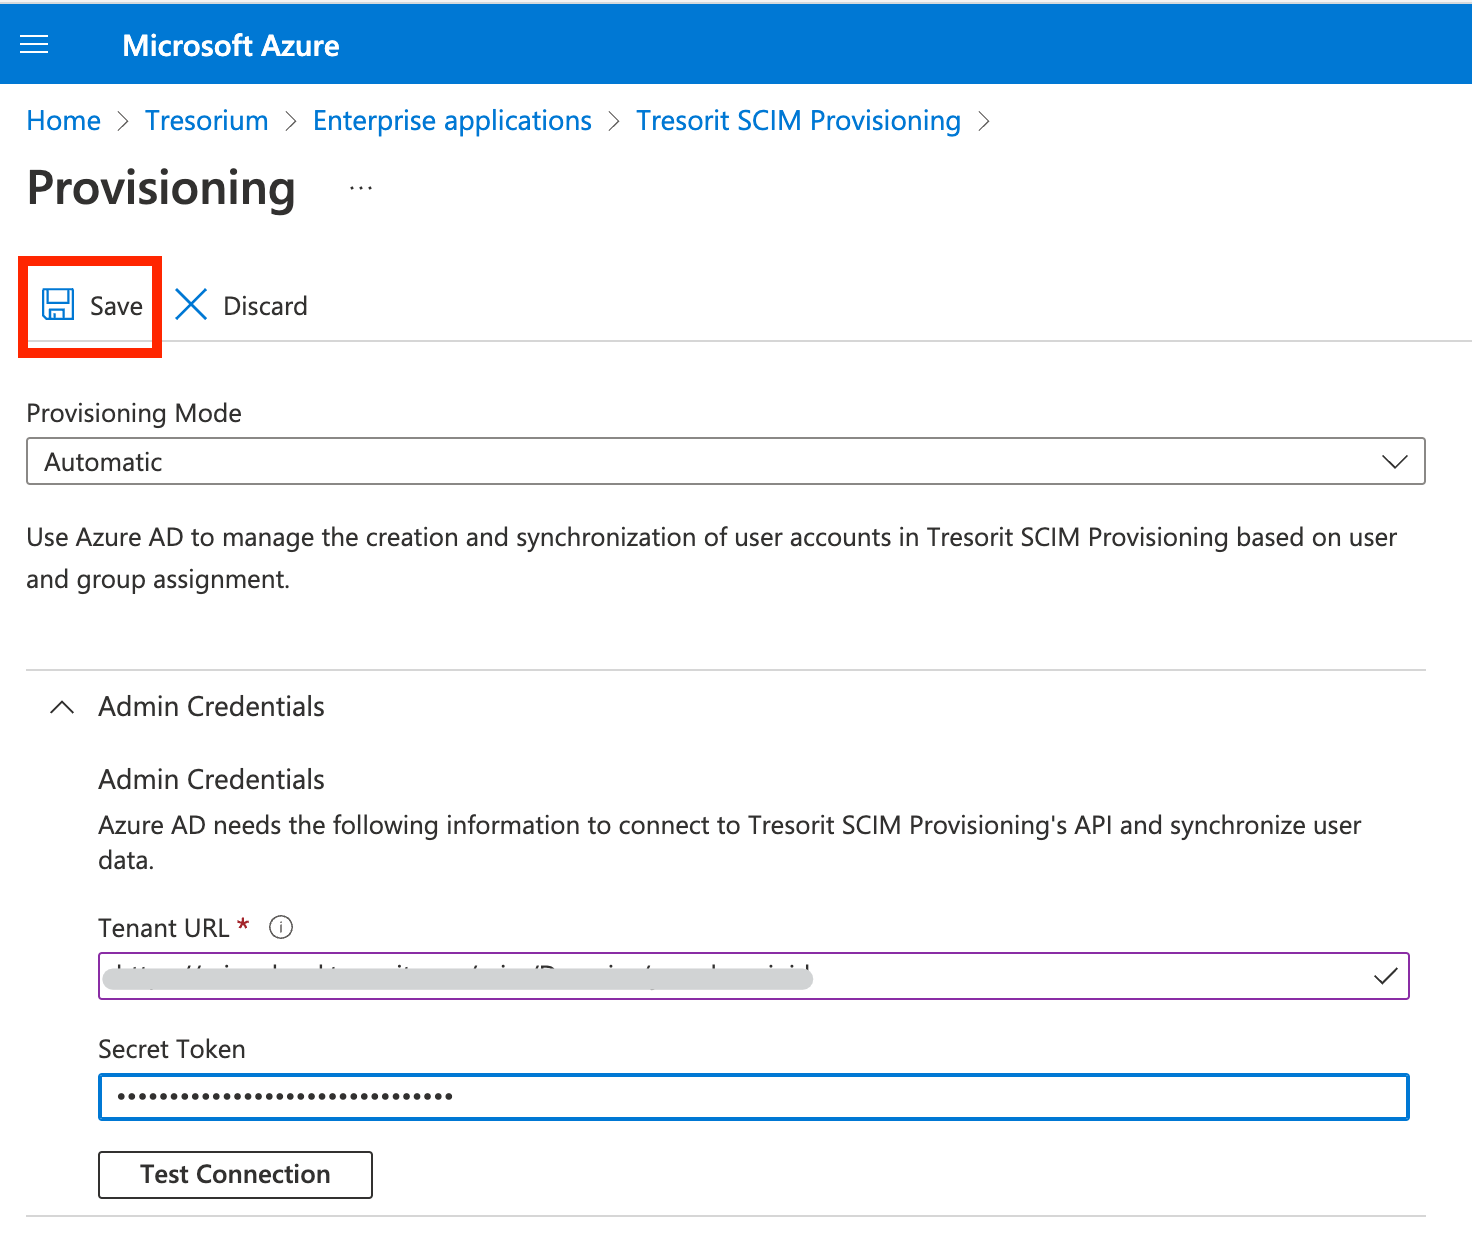
Refresh the page in your browser. Provisioning settings will not work properly on the website until refresh.
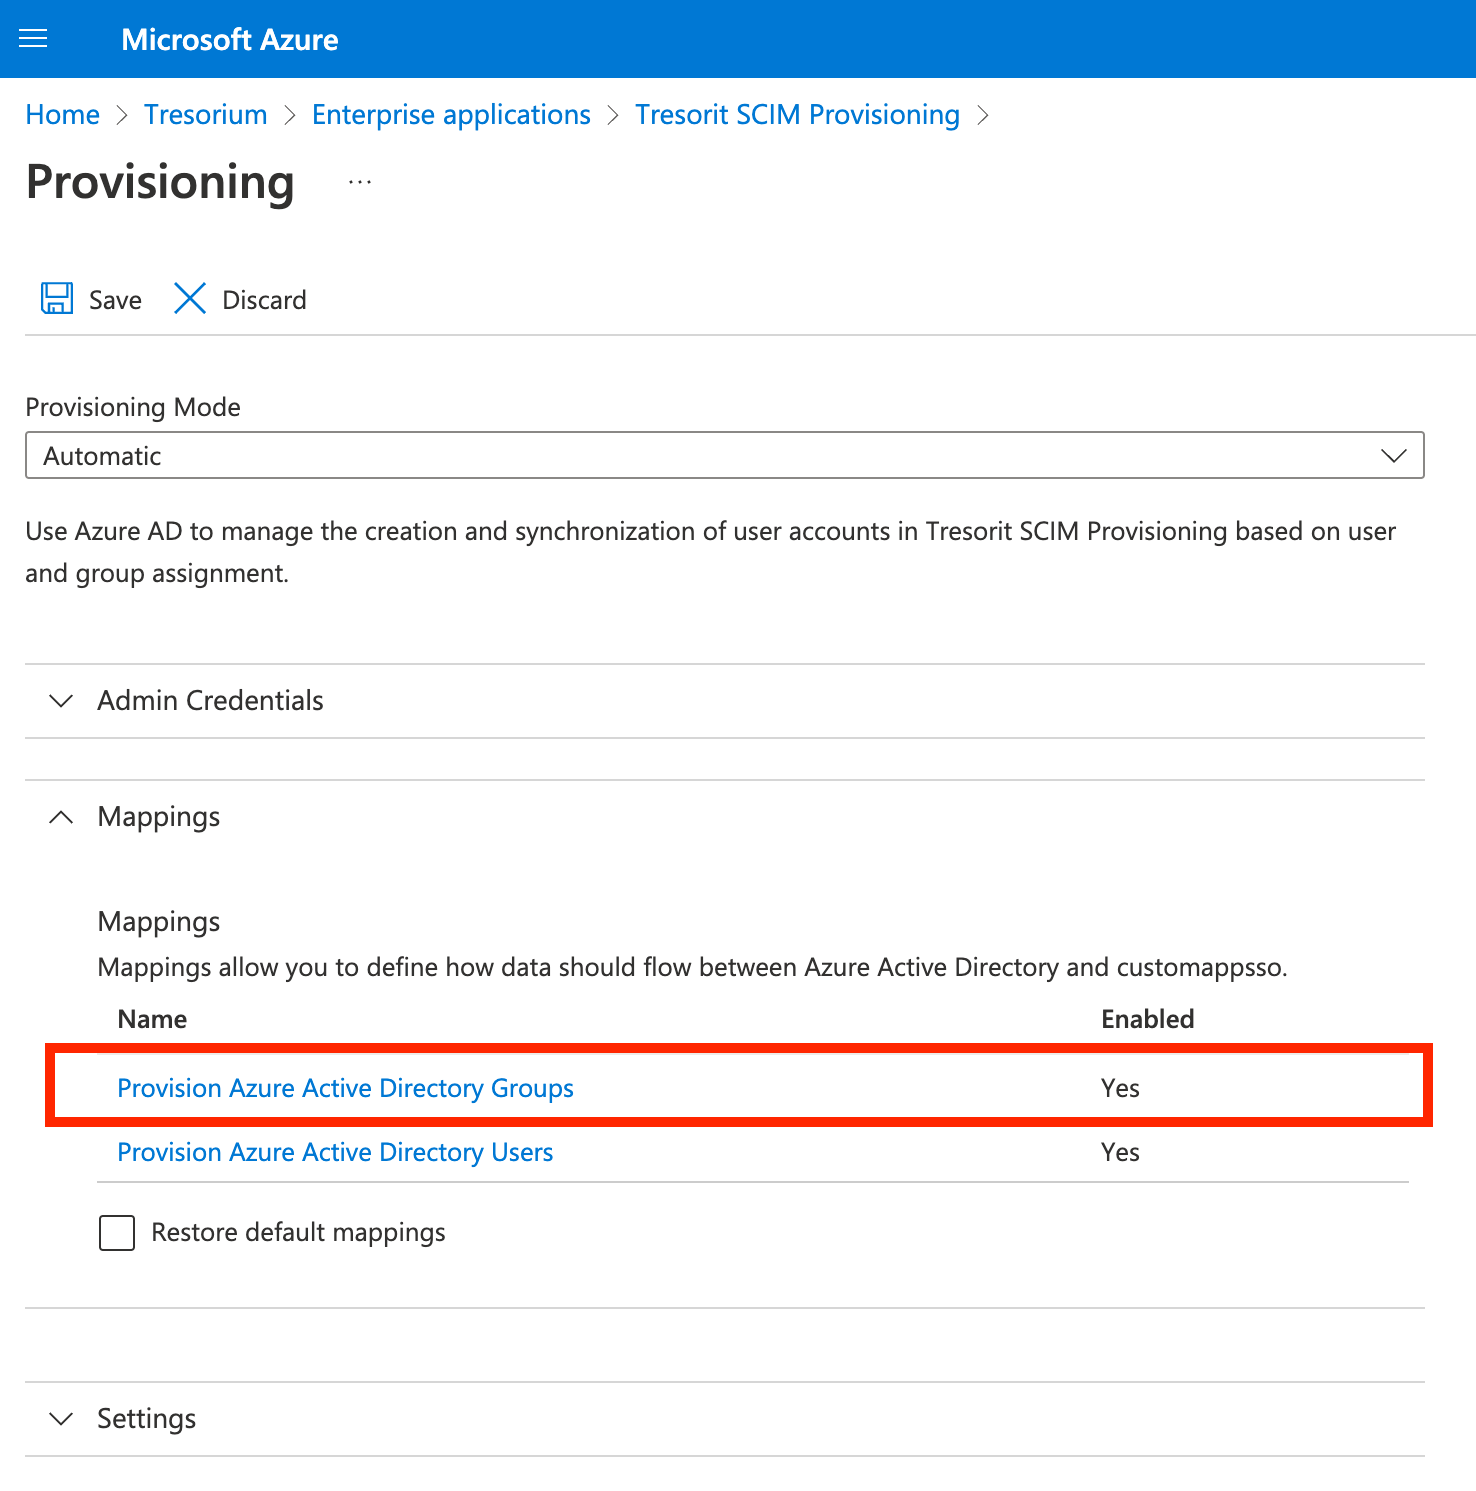
Disable group syncing
Syncing groups is currently not supported by Tresorit, therefore it must be disabled in the created Enterprise application.
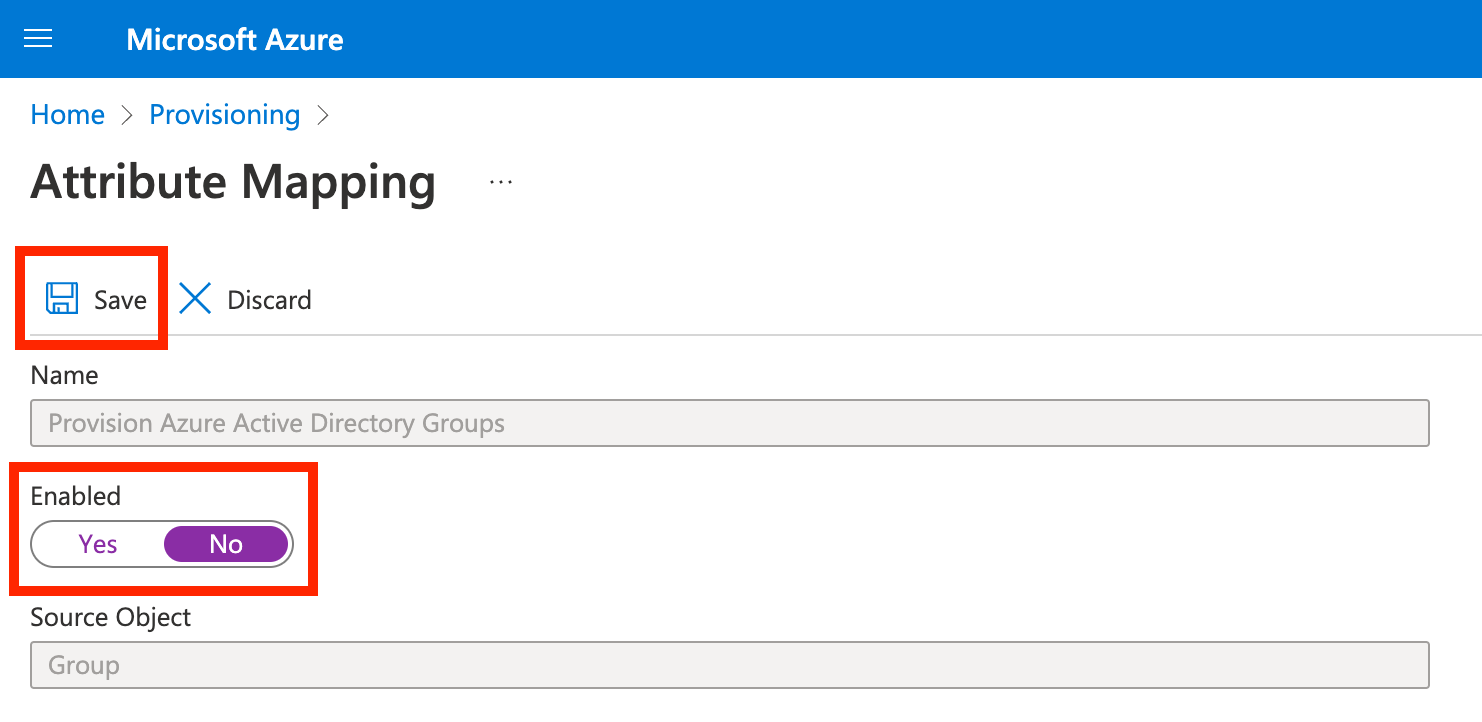
Open Mappings, then click Provision Azure Active Directory Groups and set Enabled to No. Then click Save.
Update user attribute mapping
User attribute mapping must be updated so only the relevant information is sent to Tresorit. Click Provision Azure Active Directory Users under Mapping.
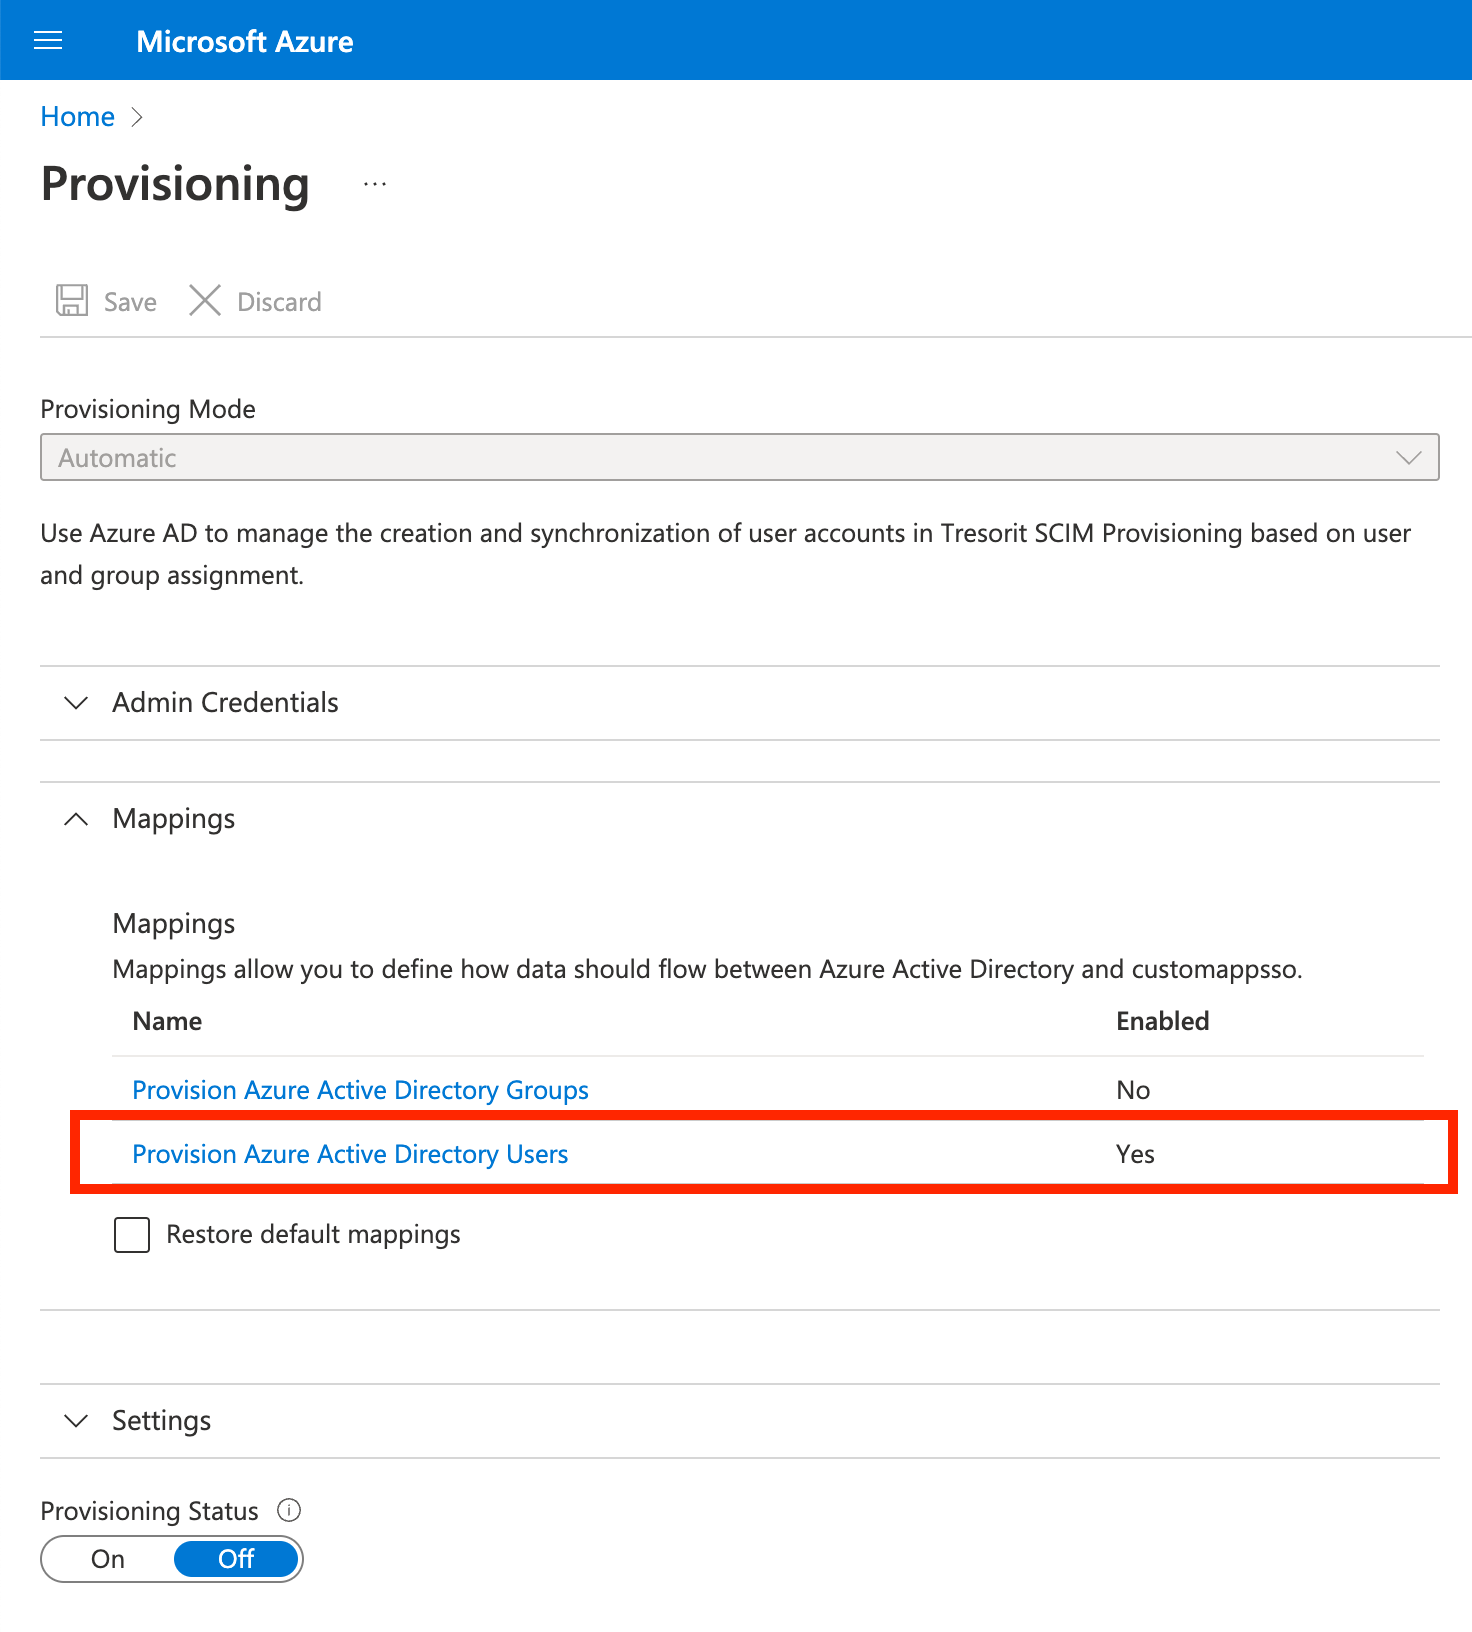
Update the attribute mappings to contain only the ones on the screenshot below, then click Save.
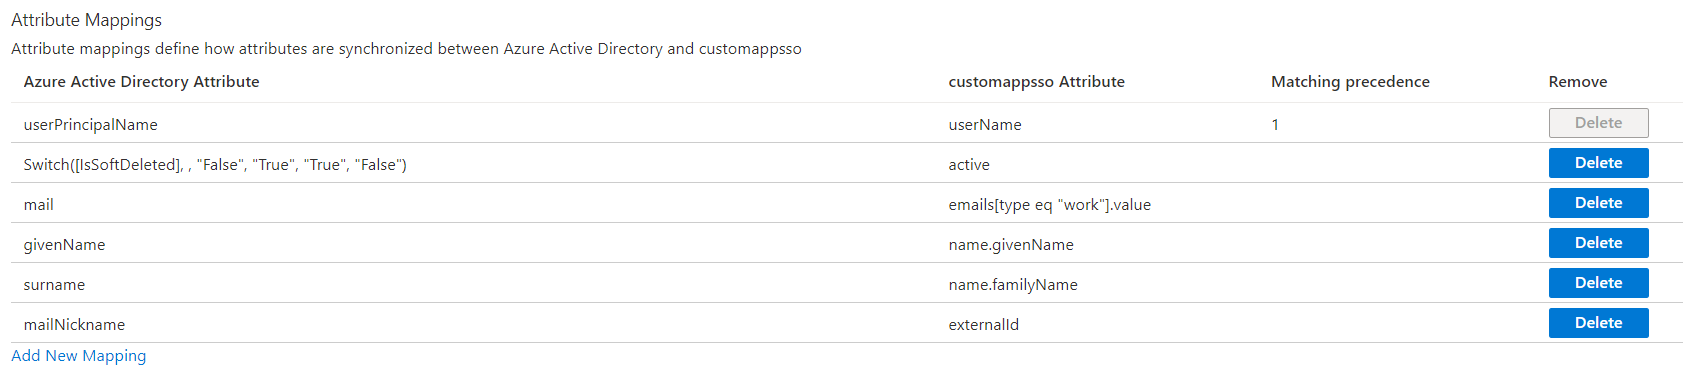
📝 Note: From the list above only the changes to the attribute which is mapped to active will have effect on the users. The other attributes only used for user invitation and account creation.
Plan a pilot
We recommend that the initial configuration of automatic user provisioning be in a test environment with a small subset of users before scaling it to all users in production. For the official Microsoft guide, please visit: Plan automatic user provisioning deployment for Azure Active Directory
Technical considerations when using Tresorit's provisioning integration
- Newly provisioned users will be automatically assigned to the Default policy template that you can configure in Tresorit Admin Center.
- Updating the user’s name does not have any effect on the Tresorit user. The name provided at registration will be in use.
- In case you change the status of SCIM managed user to Suspended on the Tresorit Admin Center UI it won’t effect their ‘active' attribute in your provisioning application
- Email address of the provisioned Tresorit user cannot be changed in the identity provider. Email address is used as an identifier in Tresorit.
Email domain verification
Although it is not required, we do recommend verifying your email domain for better control over your users. The guide for this feature: How to verify your email domain
📝 Note: Using the Add to subscription automatically option for a verified domain can result in users being added to your subscription outside SCIM provisioning. If you set up provisioning, we recommend setting either Invite only registration or Do not add to subscription for your verified domain.